
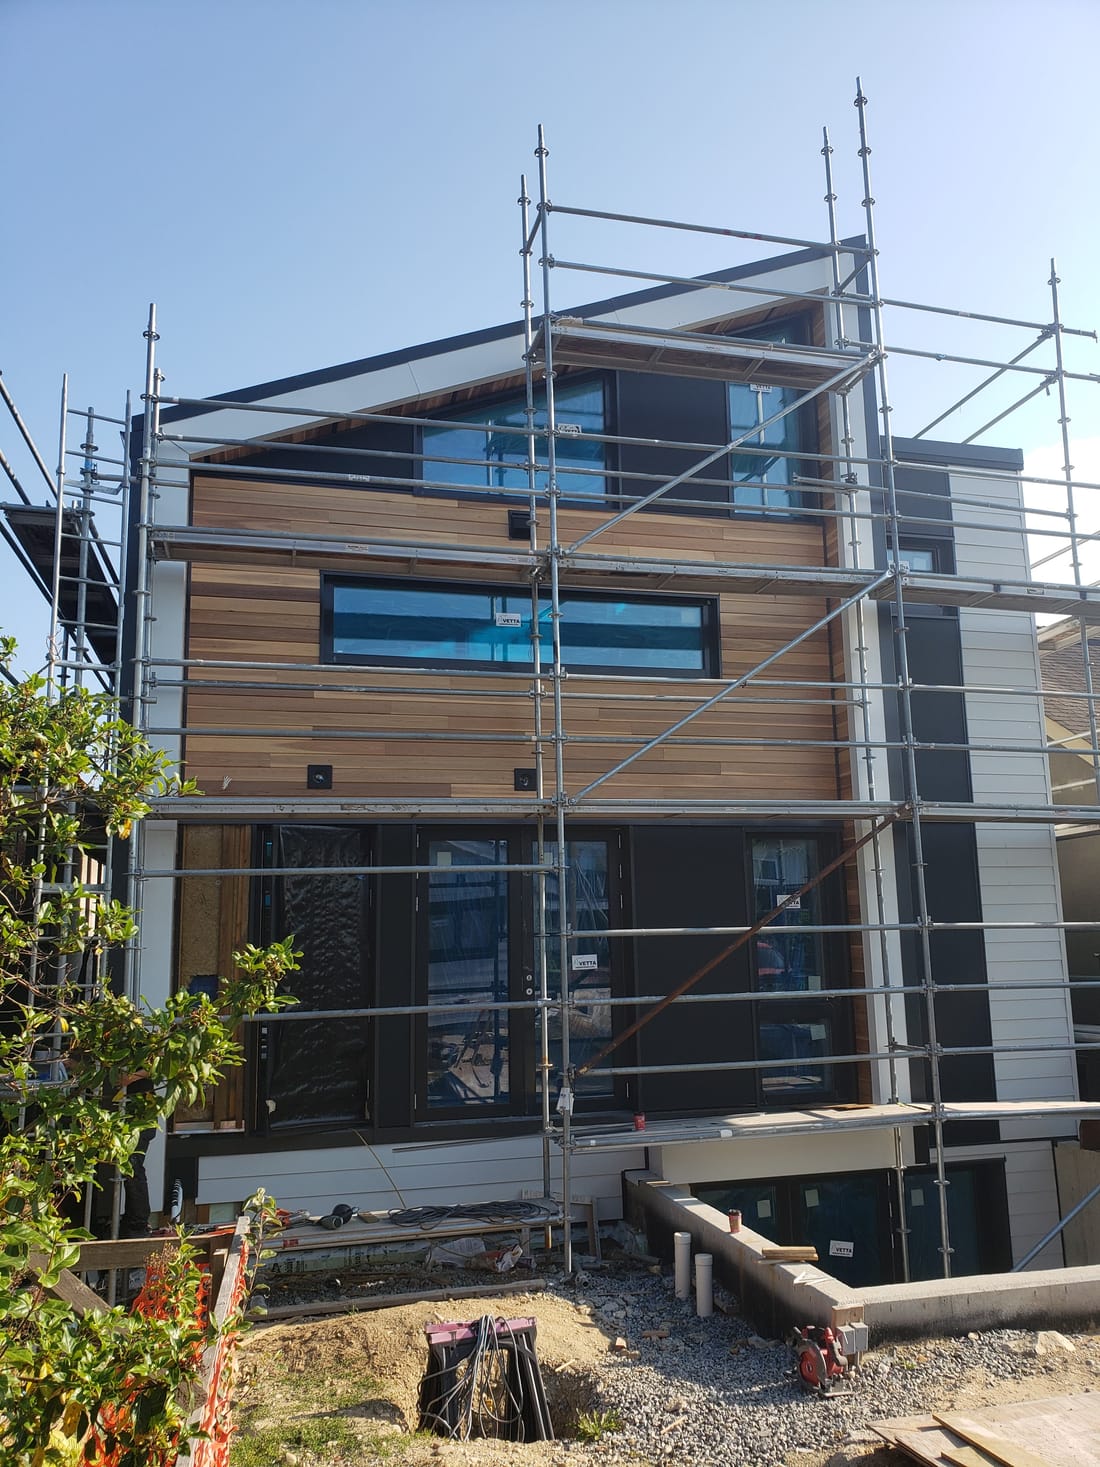
Siding Installation
Whether you are building new, finishing an addition or re-cladding after a renovation, Berkana Construction installs siding systems engineered for coastal BC weather. We handle the full assembly: weather barrier, rainscreen, flashing, cladding and trim.
What we deliver.
A siding installation is only as good as what you cannot see when it is done: the weather barrier, the flashing at every window and penetration, and the ventilation gap behind the cladding. Berkana crews install those layers to manufacturer spec on every job, then finish with clean lines and tight trim work.
- Full wall assembly, not just cladding
- Weather barrier and rainscreen strapping
- Window, door and penetration flashing
- Manufacturer-spec fastening and gapping
- Matching trim, corners and transitions
- Job site protection and daily cleanup
Projects we take on.
New Homes
Cladding packages for custom builds.
Additions & Garages
Matched or contrasting new sections.
Renovation Re-clads
New look and performance on existing walls.
Commercial
Storefronts and light commercial exteriors.
From first call to final walkthrough.
Site visit and measure
We measure the walls, review plans if it is a new build, and confirm substrate condition.
Detailed proposal
Material options, colours and profiles quoted line by line, with lead times.
Prep and barrier
Weather-resistive barrier, rainscreen strapping and flashing installed and checked before any cladding goes on.
Cladding install
Siding installed to manufacturer spec with correct fastening, clearances and expansion gaps.
Trim and closeout
Corners, trim and caulking completed, site cleaned, warranty documents handed over.
Pick the right cladding.
James Hardie
Fiber cement siding engineered for wet climates: fire resistant, rot proof and warranted for decades, installed to Hardie spec.
Cedar
Natural Western Red Cedar bevel, channel and shingle siding, installed with the detailing that keeps wood beautiful in a wet climate.
Vinyl
The budget-friendly workhorse: modern premium vinyl installed correctly, with straight lines, proper gapping and clean trim.
AL13 Panels
Architectural aluminum panel system with clean modern lines, non-combustible and engineered for fast, precise installation.
Siding Installation: what Lower Mainland owners should know.
New siding is one of the few renovations that changes how your house performs and how it looks in the same stroke. It is also a project where nearly everything that determines success gets hidden behind the finished surface within days of being done. This page explains exactly what a proper siding installation involves in the Lower Mainland, layer by layer, so you know what should be happening on your wall and can hold any installer, including us, to that standard.
What a Complete Installation Actually Includes
An installation quote that just says "supply and install siding" is leaving out most of the job. On a real project, the scope runs from the sheathing outward: substrate inspection and correction, a continuous weather resistive barrier, self adhered membrane and metal flashings at every opening and penetration, rainscreen strapping to create a drainage cavity, the cladding itself fastened to the manufacturer's schedule, matched trim at corners and openings, sealant where the system calls for it and nowhere it does not, and a full site cleanup with magnet sweeps for dropped fasteners.
Ancillary items ride along with the work. Light fixtures, hose bibs, dryer vents, gas lines, and electrical masts all pass through the wall, and every one of them needs a mounting block and a flashing detail. If exterior insulation is part of the plan, it goes on at this stage too, since adding rigid insulation outboard of the sheathing is only practical when the wall is already open.
Why Lower Mainland Walls Are Built the Way They Are
Coastal British Columbia writes some of the strictest wall assembly rules in North America, and the reason is local history. Through the 1980s and 1990s, thousands of buildings in this region were clad with face sealed systems that relied on caulking to keep water out. Caulking fails. Wind driven rain got past it, could not escape, and rotted walls on a massive scale. The repair bill across the province ran into the billions, and the building code was rewritten to require a rainscreen: a ventilated gap between the cladding and the water barrier so that any moisture that gets past the siding drains out the bottom and dries by airflow.
That gap, usually formed with vertical strapping over the barrier, is now the defining feature of a code compliant wall in our climate zone. When you see a crew installing cladding tight against house wrap on a new project around here, you are watching a mistake that this province already paid to learn.
The climate itself reinforces the rule. Maple Ridge sits against the mountains and catches more annual rain than communities closer to the Strait. Storm winds push that rain horizontally into south and east elevations. Winters add repeated swings through the freezing point, so any trapped water works joints open a little further each year. Assemblies that would survive in Kamloops fail here, which is why experience in this specific region matters more than years in the trade elsewhere.
Choosing What Goes on the Wall
Material choice shapes the install itself, not just the appearance. A quick tour of the main options, with fuller comparisons on our materials page.
Fibre Cement
James Hardie planks and panels are the default recommendation for most Lower Mainland homes for a simple reason: cement based cladding does not rot, does not feed insects, and holds factory finishes for a long time in wet conditions. It is heavy and unforgiving to cut, demands correct clearances above roofs and grade, and punishes sloppy fastening, so installer skill matters more than with forgiving materials.
Western Red Cedar
Cedar is the traditional cladding of this coast, and nothing else looks like it. It machines beautifully, takes stain well, and when detailed with proper gaps and back priming it lasts generations. The trade is maintenance: finishes need renewal every few years, and shaded elevations will grow moss and algae that must be washed off before they hold moisture against the wood.
Premium Vinyl
Modern heavy gauge vinyl is far removed from the flimsy panels of the 1990s. It never needs paint, sheds rain well, and installs quickly. It must be hung loose to float with thermal movement, which is the detail low cost installers most often get wrong: nail vinyl tight and it buckles the first hot week of summer.
Engineered Wood
Treated strand products give a convincing wood face with better dimensional stability and rot resistance than raw lumber, at a weight that is easier to handle than fibre cement. Edge sealing of every field cut is non negotiable with these products, and skipping it is a common shortcut that surfaces as swollen joints a few winters later.
Architectural Aluminum Systems
For contemporary designs, extruded aluminum planks such as Longboard and panel systems like AL13 provide dead straight lines, woodgrain and matte finishes, and essentially zero maintenance. These are engineered systems with their own clips, extrusions, and reveals, and they reward installers who follow the system rather than improvising.
Step by Step: How the Installation Is Done
Here is the sequence on a typical project, in the order it happens on site.
Substrate Review
Before anything goes on, the sheathing gets inspected and corrected. On new construction that means checking panel fastening, gaps, and flatness. On a recladding project it means probing for soft OSB or plywood, replacing compromised panels, and confirming the wall is straight enough to carry the finished product. Straightening with shims at this stage costs little; a wavy wall telegraphed through new siding is permanent.
Weather Resistive Barrier
Next comes the drainage plane, either two layers of building paper or a synthetic wrap rated for our exposure. Sheets lap shingle style, upper over lower, so water always lands on the surface of the layer below. Horizontal laps, vertical laps, and taped seams all follow the manufacturer's spec, and the barrier ties into the foundation flashing at the bottom of the wall so water exiting the cavity actually leaves the building.
Flashing Windows, Doors, and Penetrations
This is the stage where good crews earn their keep. Every opening gets a sill pan or self adhered sill membrane that turns up at the ends, jamb membranes lapped over the sill, and a rigid head flashing with end dams lapped under the barrier above. Every pipe, vent, and fixture gets a gasketed or membrane sealed detail. The logic never varies: each layer sheds onto the one below it, and sealant is a secondary line of defence, never the primary one. If your project includes new windows and doors, installing them during the siding project lets these details be built as one system instead of patched together.
Rainscreen Strapping
Vertical strapping, typically treated plywood or lumber strips fastened through to studs, goes over the barrier at each stud line. This creates the drainage and drying cavity. The bottom of the cavity is closed with a perforated screed or insect screen so air moves but wasps do not. Around openings, strapping frames the perimeter so trim and cladding have solid backing.
Hanging the Cladding
The siding itself goes up to a story pole layout so course lines land consistently around the whole building and align over windows. Fasteners hit the schedule for the product: blind nailed at the specified height on fibre cement, centred in slots and left loose on vinyl, stainless steel on cedar to prevent staining. Butt joints land on strapping and get joint flashing where the spec calls for it, clearances are held above roofing, decks, and grade, and factory finished ends face out while cut ends get touched up or sealed.
Trim, Sealant, and Cleanup
Corners, frieze boards, and window surrounds are fitted, joints are caulked only where the manufacturer calls for sealant, and the site gets its final clean: offcuts hauled away, beds and lawns swept with a rolling magnet, and a walkthrough with you before the scaffolding comes down.
What Moves the Price Up or Down
Without quoting figures, the cost drivers are consistent. Wall area and building height matter most; a three storey home needs scaffolding a rancher does not. Complexity is next: every corner, gable, bump out, and opening adds cutting and flashing time. Material choice spans a wide range, with vinyl at one end and architectural aluminum at the other. Substrate condition on recladding projects is the wildcard, since hidden rot must be fixed before covering. Access, disposal volume, and add ons like insulation or new house wrap details round out the list. A written, line itemed quote makes each of these visible so you can adjust scope deliberately instead of guessing. It also gives you a fair basis for comparing bids: when one number comes in noticeably lower, the itemization usually shows exactly which layer of the assembly it plans to skip.
Timelines and Living Through the Work
A straightforward single storey installation often runs about a week. Larger or more complex homes, or projects that include openings work and insulation, commonly run two to three. You can live in the house throughout. Expect saws and nail guns during working hours, some vibration on interior walls, and pictures worth taking down on the walls being worked. Crews should keep every elevation weathertight at the end of each day, so a stretch of November rain pauses progress rather than threatening your interior. Parking, garden access, and pet arrangements are worth agreeing on the first morning; the projects that feel smooth for homeowners are almost always the ones where those small logistics were settled early.
Mistakes We Get Called to Fix
The failures we see repeat: cladding installed directly over wrap with no cavity, missing head flashings hidden behind trim, sill pans that dam water instead of draining it, fibre cement fastened low so planks rattle in wind, vinyl nailed tight and buckled, cedar installed without back priming, and clearances ignored so siding wicks water off shingles or soil. None of these announce themselves at handover. They show up two to eight years later as staining, swelling, or soft drywall, which is exactly why the overview of how wall assemblies work is worth reading before you hire anyone.
Permits and Approvals
Like for like recladding on a detached home usually does not require a building permit in most Lower Mainland municipalities, though rules vary and structural or insulation changes can trigger one; we confirm requirements with your municipality before starting. Strata properties are different: exterior alterations almost always need council approval and consistency with the building's approved palette, and we prepare submission documents for owners going through that process.
Get a Straight Quote on New Siding
Berkana Construction Management installs siding across the Lower Mainland from our Maple Ridge base at 13490 224th St, and we have been doing this work here since 2019, licensed, insured, and WorkSafeBC compliant. Every estimate is free, written, and broken out line by line so you can see exactly where the money goes, and if your existing walls only need targeted work we will say so. Call (672) 771-6868 to arrange a site visit and a real conversation about your walls.
Common questions, siding installation.
Get a free written quote.
Tell us about your building and what you have in mind. We respond within one business day to book a free site visit, then follow up with a clear, line-itemed quote.