
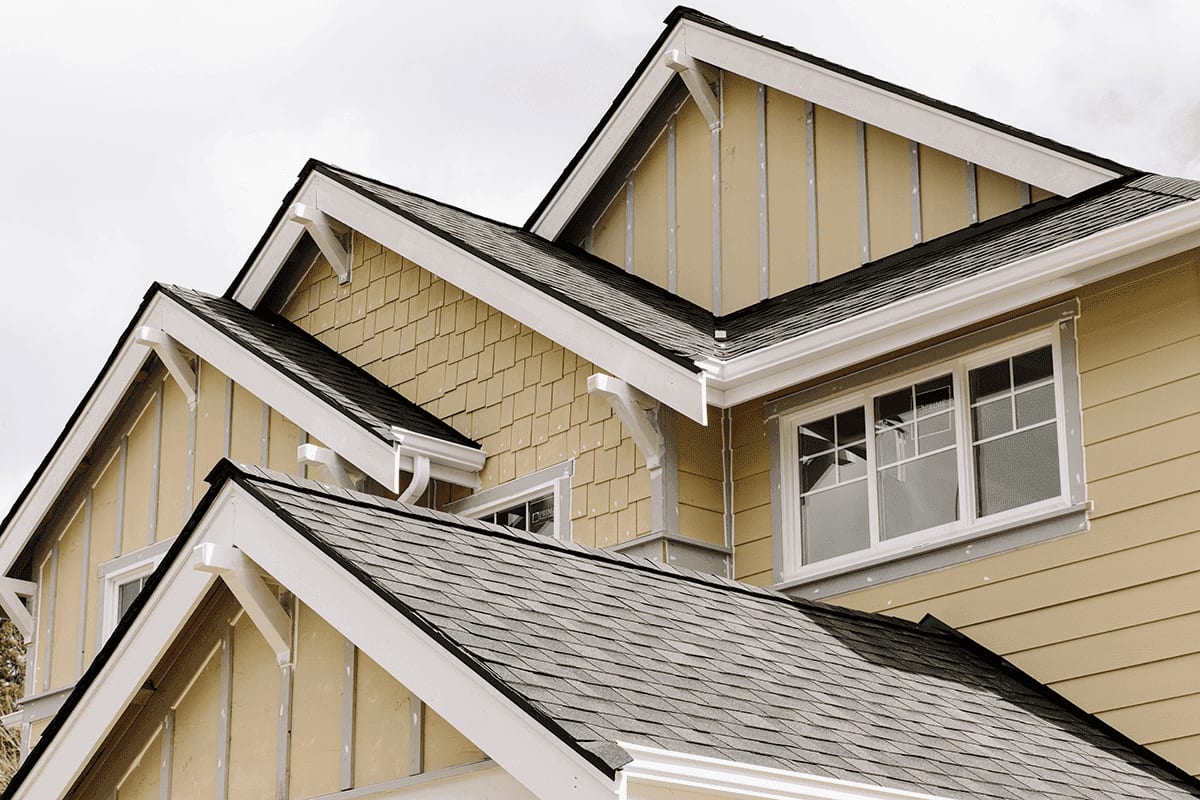
Fascia
Peeling, stained or rotten fascia boards let water into the roof structure and eventually take the gutters down with them. Berkana Construction installs custom-bent aluminum fascia across the Lower Mainland, usually paired with soffit for a complete roofline.
What we deliver.
Fascia caps the edge of the roof structure, carries the gutters and takes constant hits from water running off the roof. We brake-form aluminum fascia on site for an exact fit, repair rot in the boards behind it and integrate it properly with drip edge and gutters.
- On-site brake-formed aluminum
- Fascia board rot repair
- Gutter and drip edge integration
- Colour matched to soffit and trim
- Wind damage repairs
- Standalone or with soffit and siding
Projects we take on.
Full Roofline
Fascia and soffit replaced together.
Rot Repair
Damaged boards rebuilt before capping.
Gutter Prep
Solid fascia ahead of new gutters.
Trim Refresh
New colour and clean lines.
From first call to final walkthrough.
Roof edge check
We inspect boards, existing cladding and how water is moving off the roof edge.
Repair and form
Rotten wood replaced, aluminum bent on site to fit your exact profile.
Install and seal
Fascia fastened, drip edge integrated, joints sealed and gutters re-hung.
Pick the right cladding.
James Hardie
Fiber cement siding engineered for wet climates: fire resistant, rot proof and warranted for decades, installed to Hardie spec.
Cedar
Natural Western Red Cedar bevel, channel and shingle siding, installed with the detailing that keeps wood beautiful in a wet climate.
Vinyl
The budget-friendly workhorse: modern premium vinyl installed correctly, with straight lines, proper gapping and clean trim.
AL13 Panels
Architectural aluminum panel system with clean modern lines, non-combustible and engineered for fast, precise installation.
Fascia: what Lower Mainland owners should know.
Stand at the curb and look at the edge of your roof. That horizontal band running along the eaves, the one your gutters hang from, is the fascia. It is a small percentage of your home's exterior by area and a large percentage of its trouble by volume. Fascia takes runoff from the roof above, splash from the gutter in front, and weather from every direction, all while carrying the mechanical load of gutters full of winter rain. When fascia fails, the failure spreads: into the rafter tails behind it, the soffit below it, and eventually the wall assembly itself.
Our crews cap, repair, and replace fascia throughout the Lower Mainland, usually in combination with soffit and gutter work since the three form one continuous system at the roof edge. This page explains what fascia does, why it rots, how brake-formed aluminum capping protects it, and what a proper repair sequence looks like on a coastal BC home.
The Job Fascia Does at the Roof Edge
Fascia is the finished vertical face nailed across the ends of the rafter tails. Structurally, it ties the rafter ends together so they stay aligned and resist twisting. Functionally, it does four things at once.
It provides the mounting surface for gutters. Every kilogram of water moving through your eavestroughs hangs from fasteners driven into the fascia board, which means a softened fascia eventually lets the gutter pull away, tilt out of slope, and dump water where it should not go.
It closes the eave cavity on the vertical plane, working with the soffit to keep weather and pests out of the roof overhang.
It backs the drip edge. The metal flashing at the roof perimeter laps down over the face of the fascia so that water leaving the roof surface is directed into the gutter rather than curling back against the wood.
And it defines the visual line of the roof. A straight, crisply capped fascia makes the whole house read as well kept. A stained, peeling one does the opposite, no matter how new the siding is.
Why Fascia Boards Rot
Understanding the failure helps you understand the fix. Fascia rot in our climate comes from a handful of repeating mechanisms.
The first is gutter overflow. When gutters clog or are undersized for the roof area feeding them, water sheets over the back edge of the trough and runs down the fascia face. In a Lower Mainland winter that can happen for weeks at a time, keeping the board saturated through months when it has no chance to dry.
The second is capillary wicking at the drip edge. If the roof's perimeter flashing is missing, too short, or installed behind rather than over the gutter's back flange, water tracks around the shingle edge by surface tension and finds the upper edge of the fascia board. That edge is end grain and raw wood on many older homes, and end grain drinks water like a straw bundle.
The third is joint failure. Fascia boards meet at corners and splices, and every joint is a place where paint cracks and water enters. Once inside, moisture is trapped behind the paint film, and the board rots from within while the surface still looks passable.
The fourth is contact rot from behind. A failed gutter seal or an ice dam pushes water into the cavity behind the fascia, wetting the rafter tails and the back face of the board where no one can see it. By the time the face shows staining, the hidden side is often far worse.
Cedar and pre-primed finger jointed fascia stock both fall victim to these mechanisms; the difference is only pace. That is why capping, not just repainting, is the durable answer.
Brake-Formed Aluminum Capping Explained
Aluminum fascia capping is sheet aluminum bent to wrap the face and edges of the fascia board, forming a continuous weather barrier that does not need paint and does not absorb water. The critical phrase is brake-formed. A portable sheet metal brake on site lets us bend each length of capping to match the exact dimensions of your fascia: its height, the depth of its lower return, and any angle where the roof pitch meets the board.
Why Site Forming Matters
Stock pre-bent fascia covers come in a handful of standard heights. Real houses do not. Rafter depths change between eras of construction, previous repairs leave odd dimensions, and gable trims often run a different height than eave runs. Forcing a stock profile onto a non-standard board leaves gaps at the upper edge or a loose, oil-canning face that rattles in wind. Site forming means the metal fits the board it is covering, tight at the upper edge under the drip flashing and crisp along the lower return that closes over the soffit edge.
Site forming also lets us handle transitions properly: wrapping outside corners with folded, overlapped metal rather than caulked butt joints, forming tapered pieces where fascia height changes, and returning the metal cleanly at gable ends. The joints are lapped in shingle fashion, upstream over downstream, so gravity works for the assembly instead of against it.
One thing capping is not: a disguise for rot. Wrapping a spongy board in aluminum traps moisture against wood that can no longer dry, and the rot continues in the dark. Any board that fails a probe test comes out before metal goes on. We put that in writing on every quote.
Repairing Rotted Fascia
When probing reveals decay, the repair sequence runs like this. The gutter comes down first, since it is fastened through the fascia face. The capping or old paint layers come off, and we assess how far the rot extends. Localized rot at a joint or below a persistent gutter overflow point can be cut back to sound wood at the nearest rafter tails and a matching section of new material spliced in. Widespread softness means full board replacement along that run.
With the board off, the rafter tail ends are exposed, and this is the inspection moment that matters. Tails that have wicked moisture from the rotting fascia get cut back to sound wood and sistered, because new fascia nailed to punky tails will not hold gutter loads for long. This is also when we can see up into the eave cavity and confirm the soffit framing and the wall intersection are dry. Where the damage traces back to a larger water management failure, we will tell you plainly, and if the wall below shows staining we recommend dealing with it as siding repair at the same time rather than closing up a known problem.
New fascia stock goes on with corrosion resistant fasteners, joints landed on solid backing, and a primed or sealed upper edge. Then the metal capping is formed and installed over it.
Gutter Integration
Fascia and gutters are so interdependent that we treat them as one scope. The gutter's back flange should sit over the face of the capping with the roof drip edge lapping into the trough, so that every drop leaving the roof has a metal path into the gutter. Hanger selection matters as well: hidden hangers screwed through the capping into solid wood at close spacing carry our wet coastal snow loads far better than the spike and ferrule systems still found on older homes, which loosen in the very holes they enlarged.
If your existing eavestroughs are tired, replacing them while the fascia is exposed is efficient and avoids puncturing fresh capping later. We coordinate that work as part of our gutters and downspouts service so the roof edge is completed as one assembly with one crew responsible for the whole detail.
Drip Edge and Flashing Details
The junction between roofing and fascia deserves its own attention. The drip edge flashing at the eaves should extend up under the roofing underlayment and down over the upper edge of the fascia capping, with enough projection that water drops into the gutter rather than clinging to the metal face. At gable ends, the flashing keeps wind-driven rain from getting behind the fascia on the raked edge.
To be clear about scope: we are a cladding and exterior trim contractor, not roofers, and we do not work on the roof surface itself. Where a drip edge is missing or buried under multiple roofing layers, we detail our capping to the existing edge as tightly as conditions allow and flag the flashing issue in our written quote so you can have a roofing contractor address it. What we will not do is pretend a flashing problem does not exist and cap over it.
Colour Matching and Finish
Aluminum fascia capping comes factory finished in a broad range of baked-on colours, and the finish is warrantied against peeling and chalking in ways site-applied paint never is. Most projects land in one of two directions. Matching the trim colour to the soffit and window trim creates a continuous frame around the roofline. Contrasting it against the wall colour makes the roof edge a deliberate line, which works especially well with darker modern palettes on James Hardie and other panel claddings.
We bring physical samples rather than relying on screens, because colour on a small chip in your hand behaves differently than a hundred linear feet in daylight. If you are planning exterior painting or new cladding in the near future, tell us during the quote. Sequencing the fascia colour decision alongside those choices avoids the common regret of trim that matched the old scheme and clashes with the new one.
Our Fascia Process from Quote to Cleanup
Every project starts with a roofline assessment: probing boards at gutter outlets and corners where rot starts first, checking gutter slope and fastening, sighting along the eave for sag, and looking behind existing capping where it is loose enough to inspect. You receive a free written quote with each element listed separately, board replacement priced apart from capping, so you can see where the money goes and what can be phased.
On installation day the crew protects landscaping below the work zone, strips and disposes of old material, completes wood repairs, forms and installs the capping, reinstates or replaces gutters, and magnet-sweeps the ground for fasteners before leaving. Berkana Construction Management has run this trade across the Lower Mainland since 2019, licensed, insured, and WorkSafeBC compliant, and the same standards apply whether the job is one rotted board on a rancher or full roofline trim on a three storey home.
Book a Roofline Assessment
If your gutters are pulling loose, your trim is staining, or you just want the roof edge finished in clean metal that never needs paint, call Berkana at (672) 771-6868. We serve Maple Ridge and communities across the Lower Mainland, and the written, line-itemed quote is free.
Common questions, fascia.
Get a free written quote.
Tell us about your building and what you have in mind. We respond within one business day to book a free site visit, then follow up with a clear, line-itemed quote.