
Your Siding Replacement Week by Week: What Actually Happens
A week by week walkthrough of a typical Lower Mainland siding replacement, from assessment and material ordering to tear-off, installation and walkthrough.
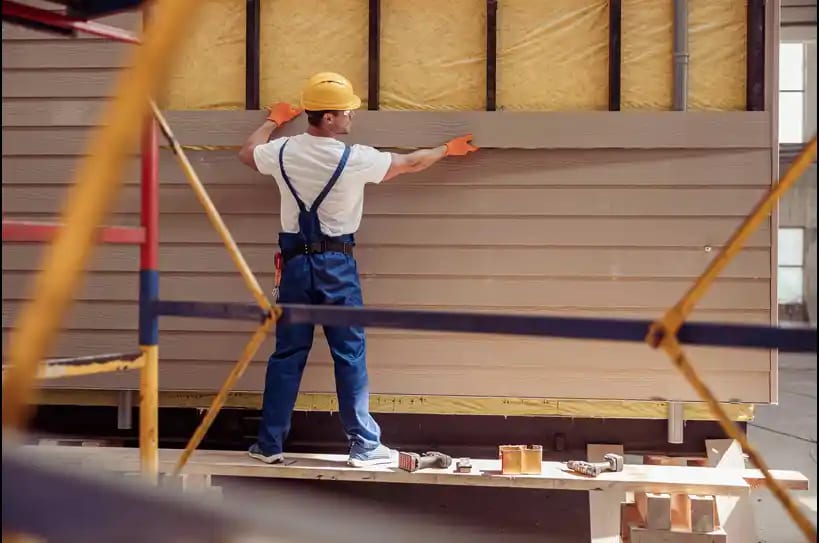
A siding replacement is not one continuous burst of construction. It unfolds in phases: an assessment and quote, a quiet ordering period, a noisy week or two of tear-off and installation, and a final detailing stretch. Knowing which week brings what removes most of the anxiety, so here is the sequence as it typically plays out on a Lower Mainland home.
Before Week One: Assessment, Quote and Ordering
The visible project starts weeks before a ladder appears. First comes an assessment visit, where the contractor measures the walls, inspects the existing cladding, checks flashings and looks for early evidence of what might be hiding underneath. A detailed quote follows, covering the cladding itself plus the layers people forget: building paper or wrap, flashings, trim, and any exterior insulation being added while the walls are open.
Once you sign, materials get ordered. Standard vinyl profiles may arrive within days, while specific fibre cement colours, engineered wood profiles or metal panels can take several weeks. This ordering gap is normal and is not lost time; it is when permits are confirmed where needed and the crew schedule is locked.
Week One: Setup and Tear-Off
The crew arrives, and the first day is mostly preparation: protecting decks, gardens and walkways, positioning the disposal bin, setting up ladders or scaffolding, and confirming site logistics with you. Then tear-off begins.
Old cladding comes off wall by wall, not all at once. A careful crew strips only as much as it can re-protect the same day, because a Lower Mainland forecast is never a promise. As each wall opens up, the sheathing underneath gets its first inspection in decades. This is the moment of truth for the project: sound sheathing means full speed ahead, while soft or stained areas get flagged, photographed and discussed with you before repairs proceed.
Expect this week to be the loudest and messiest of the project. Good crews run magnet sweeps for nails daily and keep debris contained, but the property will look like a job site because it is one.
Week Two: The Wall Assembly Goes Back Together
With walls stripped and any repairs complete, the rebuild starts from the inside out. New building paper or house wrap goes on first, lapped so that every sheet sheds water over the one below it. Flashings follow at windows, doors, penetrations and horizontal transitions. If the project includes a rainscreen, strapping goes up next, creating the drainage gap that lets the wall shed and dry the way modern BC building practice expects.
Only then does the new cladding begin. Siding installation moves at different speeds depending on material: vinyl runs quickly, fibre cement and engineered wood take longer because of cutting and joint detailing, and panel systems demand precise layout before the first panel is fixed. Watching the crew spend a whole morning on layout lines is not slowness; it is the difference between walls that read straight and walls that visibly drift.
Trim, corners and transitions get built as the field of each wall fills in. Around openings, this is also when tie-ins to windows and doors are flashed and sealed, one of the highest-stakes details on the entire project.
Week Three: Detailing, Cleanup and Walkthrough
The final stretch is about the small things that separate a decent job from a tight one. Caulking gets completed at designated joints, penetrations like hose bibs and vents receive their finished trim rings, soffit and fascia tie-ins are closed up, and any painted elements receive their final coat in a suitable weather window.
Cleanup should be thorough: nails swept, bin removed, plantings uncovered and walkways cleared. Then comes the walkthrough. Walk every wall with the contractor, look at joints and transitions up close, and ask about anything that catches your eye. You should leave that conversation with your warranty documentation, care guidance for the material you chose, and photos of any hidden repairs that were made along the way.
How You Can Keep the Project Moving
Homeowners influence the schedule more than they realize, mostly in the week before crews arrive. Clear vehicles away from the work zones, move patio furniture and planters back from the walls, trim shrubs that crowd the cladding, and take down anything mounted on exterior walls, from hose reels to holiday lights. Inside, remove pictures and shelves from exterior walls, since hammering and cutting transmit vibration through the framing. Decide early where the bin and material stacks can sit, and let the crew know about sprinkler lines, pets and any gate codes. None of this takes more than an afternoon, and it routinely saves the crew half a day of working around obstacles.
What Stretches a Timeline, and What Should Not
Three things legitimately extend a siding replacement: hidden rot discovered at tear-off, added scope such as insulation or window changes, and sustained severe weather. What should not stretch it is disorganization, and you can screen for that before signing. Ask how the contractor sequences tear-off against the forecast, how change orders are priced when surprises appear, and whether the same crew stays on your project from start to finish.
For the bigger picture of deciding whether replacement is even the right call, our guide to siding repair and replacement in the Lower Mainland covers the full decision framework.
Ready to See Your Own Schedule?
Berkana Construction Management plans and builds siding replacements across Maple Ridge and the Lower Mainland, and every project starts with a clear written sequence so you know what each week holds. Call (672) 771-6868 or request an assessment to get a timeline built around your home.